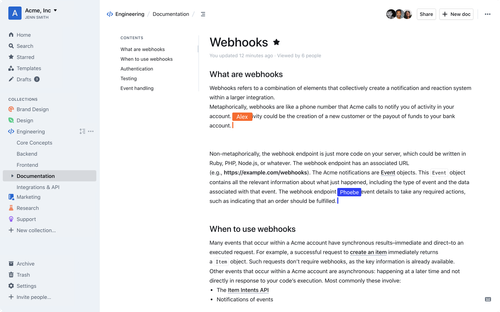
สิ่งที่สำคัญมากๆ อย่างหนึ่งเลย สำหรับการทำงาน คือ Knowledge Base มันเป็นการส่งต่อความรู้ วิธีการออกแบบ ปัญหา และ solution มันควรถูกรวบรวมไว้ในที่ๆ เดียวกัน เพื่อให้คนในทีมสามารถ เข้ามาหาข้อมูลได้
ซึ่งผมเองก็ให้ความสำคัญกับมันเป็นอันดับต้นๆ เลย
ดังนั้นบทความนี้ มาแชร์ตัว Outlinewiki หน้าตามันเหมือนกับ Notion เลย ซึ่งตัว Outlinewiki นั้นมีทั้ง version ที่เสียเงิน และ version ฟรี ที่เป็น Community Edition
ดูเพิ่มเติมได้ที่นี่ https://www.getoutline.com/pricing
Installation
เราสามารถติดตั้งได้หลายแบบ ในบทความนี้เรามาลองติดตั้งผ่าน docker กัน
โดยการ login นั้นตัว outlinewiki จะรองรับได้หลายแบบ SSO, OIDC, and SAML แต่จะไม่รองรับการ login ด้วย email+password แต่จะมีแบบเป็น one-time password มาให้แทน
เข้าไปดูเพิ่มเติมได้ที่นี่
Configuration
ตัวอย่างนี้จะกำหนดค่าต่างๆ ไว้ในไฟล์ docker.env สามารถเข้าไปดูค่าต่างๆ ได้ที่นี่ https://github.com/outline/outline/blob/main/.env.sample
Docker Compose
1.สร้างไฟล์ docker-compose.yml ขึ้นมาก่อน ในไฟล์
version: "3.2"
services:

  outline:
    image: docker.getoutline.com/outlinewiki/outline:latest
    env_file: ./docker.env
    ports:
      - "3000:3000"
    volumes:
      - storage-data:/var/lib/outline/data
    depends_on:
      - postgres
      - redis

  redis:
    image: redis
    env_file: ./docker.env
    ports:
      - "6379:6379"
    volumes:
      - ./redis.conf:/redis.conf
    command: ["redis-server", "/redis.conf"]
    healthcheck:
      test: ["CMD", "redis-cli", "ping"]
      interval: 10s
      timeout: 30s
      retries: 3

  postgres:
    image: postgres
    env_file: ./docker.env
    ports:
      - "5432:5432"
    volumes:
      - database-data:/var/lib/postgresql/data
    healthcheck:
      test: ["CMD", "pg_isready", "-d", "outline", "-U", "user"]
      interval: 30s
      timeout: 20s
      retries: 3
    environment:
      POSTGRES_USER: 'user'
      POSTGRES_PASSWORD: 'pass'
      POSTGRES_DB: 'outline'

  https-portal:
    image: steveltn/https-portal
    env_file: ./docker.env
    ports:
      - '80:80'
      - '443:443'
    links:
      - outline
    restart: always
    volumes:
      - https-portal-data:/var/lib/https-portal
    healthcheck:
      test: ["CMD", "service", "nginx", "status"]
      interval: 30s
      timeout: 20s
      retries: 3
    environment:
      DOMAINS: 'docs.mycompany.com -> http://outline:3000'
      STAGE: 'production'
      WEBSOCKET: 'true'
      CLIENT_MAX_BODY_SIZE: '0'

volumes:
  https-portal-data:
  storage-data:
  database-data:
docker-compose.yml
Database
สร้าง database ขึ้นมาด้วยคำสั่งนี้
docker compose run --rm outline yarn db:create --env=production-ssl-disabledถ้ามีการ database ใหม่ เพิ่มตาราง ดัชนี ฯลฯ ที่จำเป็น:
docker compose run --rm outline yarn db:migrate --env=production-ssl-disabledRunning
เราจะ run ผ่าน docker
docker compose up -d
