เรามาลองอะไรง่ายๆ กันก่อน โดยการเชื่อมต่อกับ OpenAPI
ต้องบอกไว้ก่อนว่า ในการใช้งาน api model ของ OpenAPI นั้น เราจำเป็นต้องจ่ายเงิน (Topup) เข้าไปก่อน ซึ่งถ้าใครไม่อยากจ่ายเงิน ก็สามารถข้ามบทความนี้ไปใช้ llm แบบ local ได้เลย
หรืออยากจะอ่านไว้ ก่อนก็ได้นะ
Setup Billing and Topup Credit
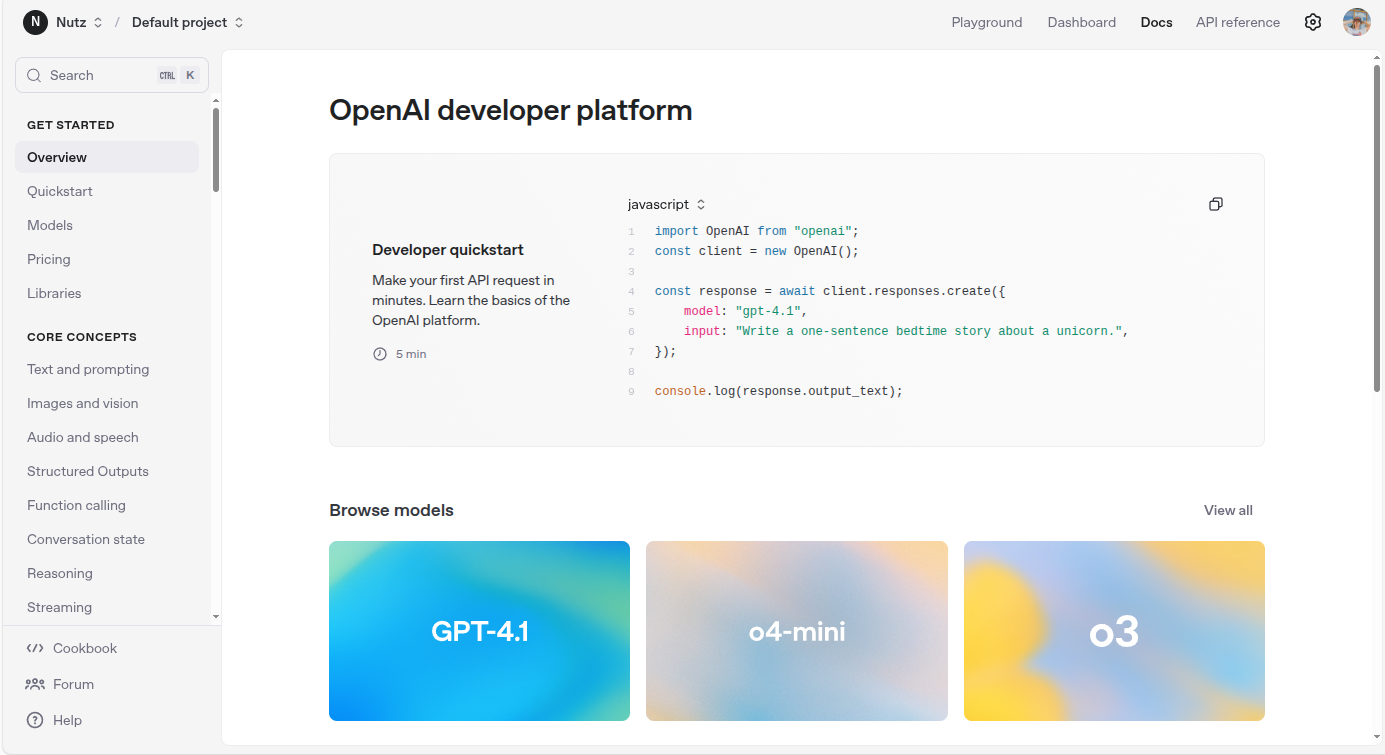
ให้เราเข้าไปที่ https://platform.openai.com
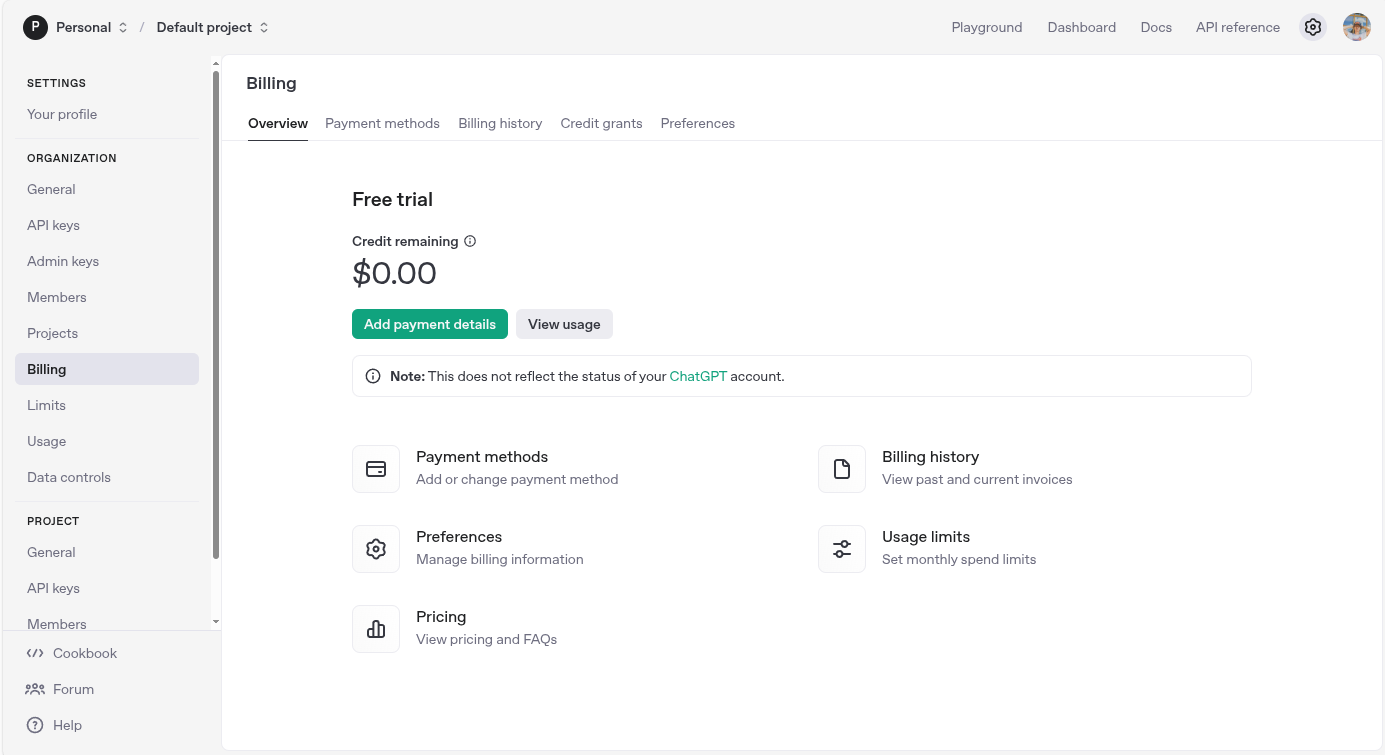
จากนั้นเลือก settings (รูปเฟืองขวาบน)
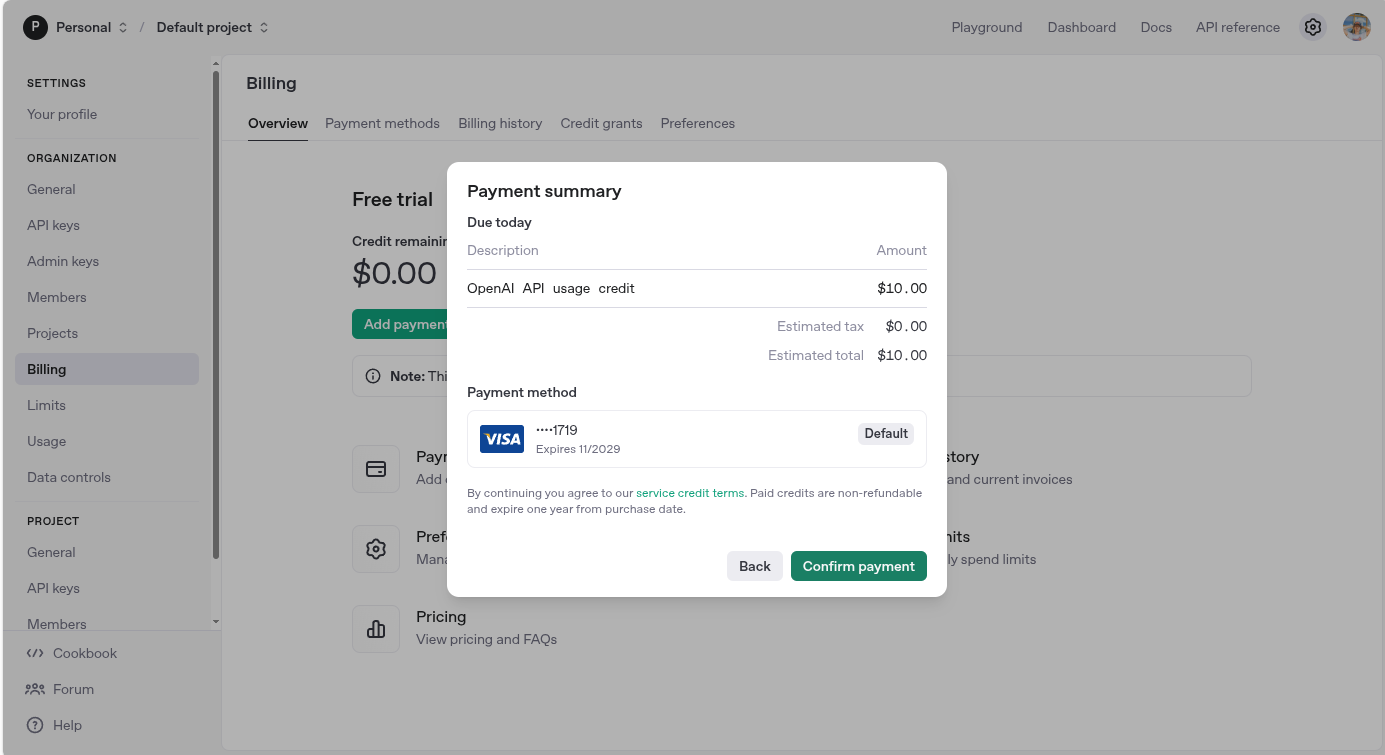
จากนั้นเลือกเมนู Billing แล้วกด Add payment details
จากนั้น มันจะให้เรากำหนดการ topup เงินเข้าไป โดยเราเลือก topup เข้าไป 10 usd ส่วนช่องอื่นๆ ก็เลือกน้อยที่สุดไว้ก่อน ซึ่งรวม total แล้ว จะเท่ากับ 20 usd หรือ ~654 thb
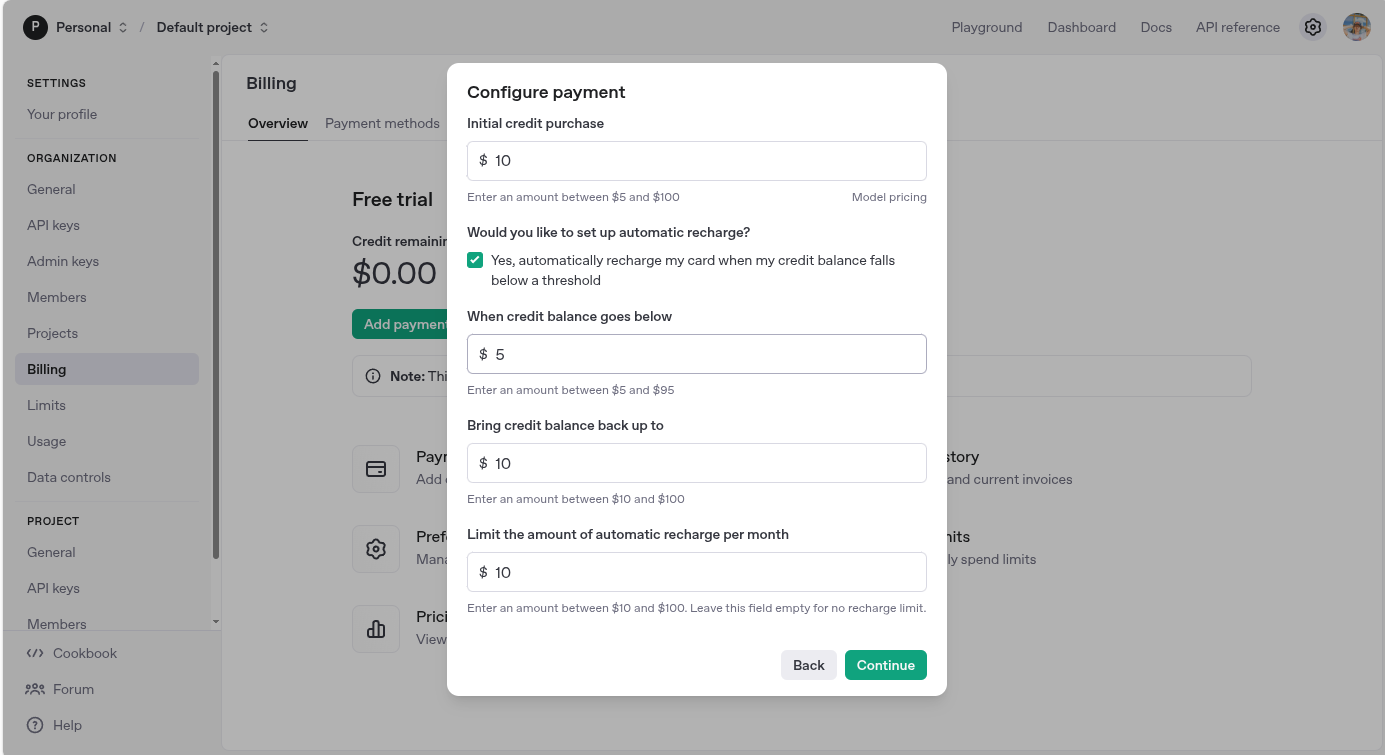
เสร็จแล้วก็กดจ่ายเงิน เพื่อเติม เงินเข้า ระบบ
Create API Keys
เข้าไปที่ platform ของ OpenAPI หรือกดลิงค์นี้ https://platform.openai.com
จากนั้นเลือกเมนู dashboard > แล้วกดไปที่เมนู API Keys หรือ กดที่ลิงค์นี้เลยก็ได้นะ https://platform.openai.com/api-keys
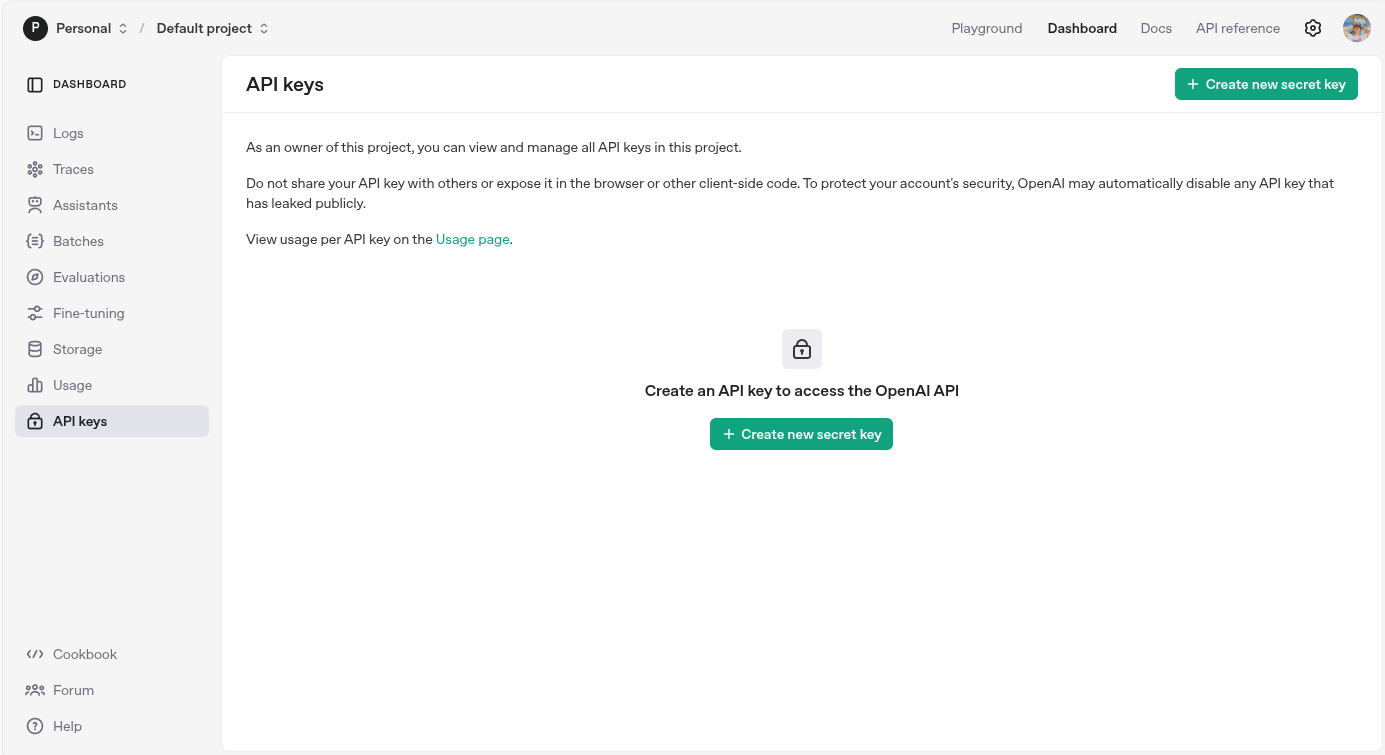
เราก็จะเจอกับหน้า API Keys จากนั้นก็กด create new secret key
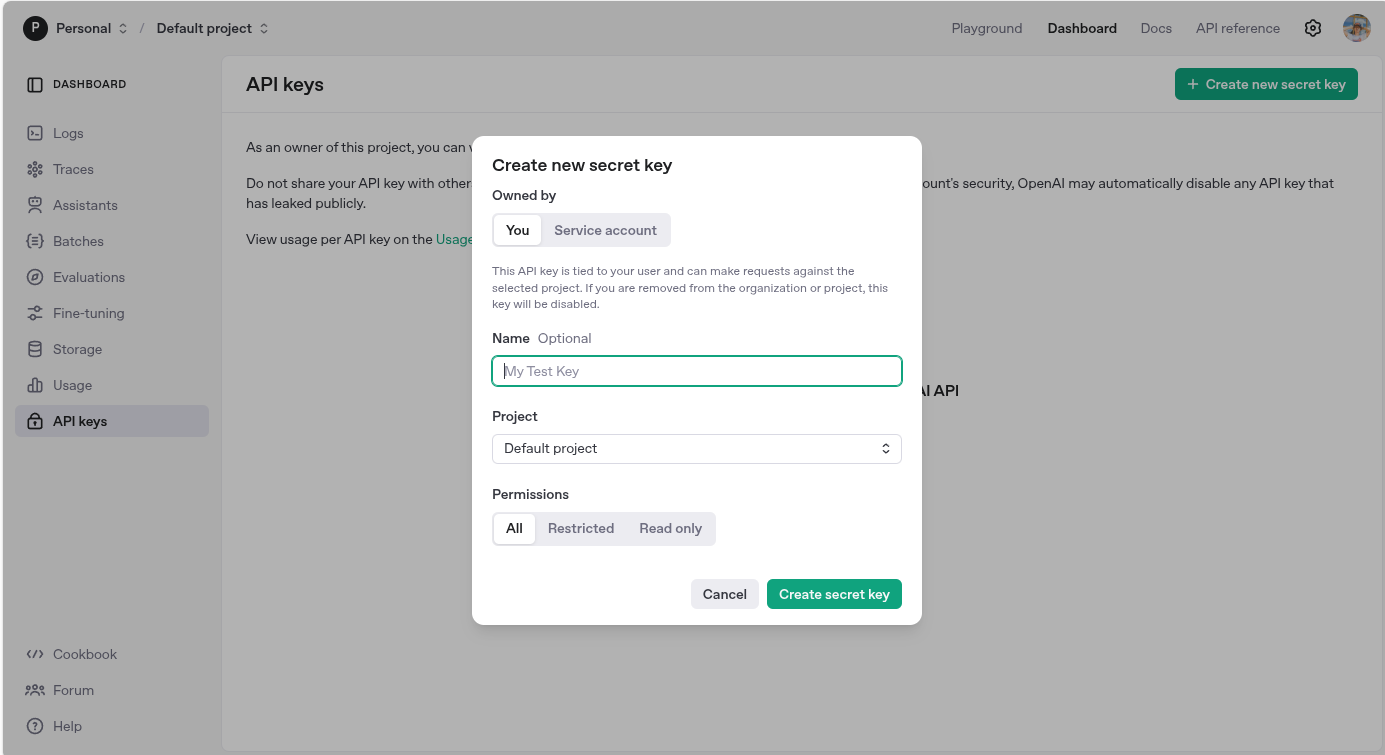
ให้เรากำหนด
- name: ชื่อของ api key ตัวนั้น
- Project: เลือกโปรเจค (หากยังไม่ได้สร้างก็จะเป็น default project)
- permission: เราสามารถกำหนดได้ว่า จะให้สิทธิ์แค่ไหน (All: ทั้งหมด, Restricted: จำกัดสิทธิ์การเข้าขึ้น, Read Only: อ่านข้อมูลเท่านั้น)
จากนั้นกด create secret key
ระบบก็จะสร้าง api key ให้เรา ให้ copy api key (secret key) เก็บไว้ เพราะเราจะไม่สามารถเข้ามา copy มันได้อีก
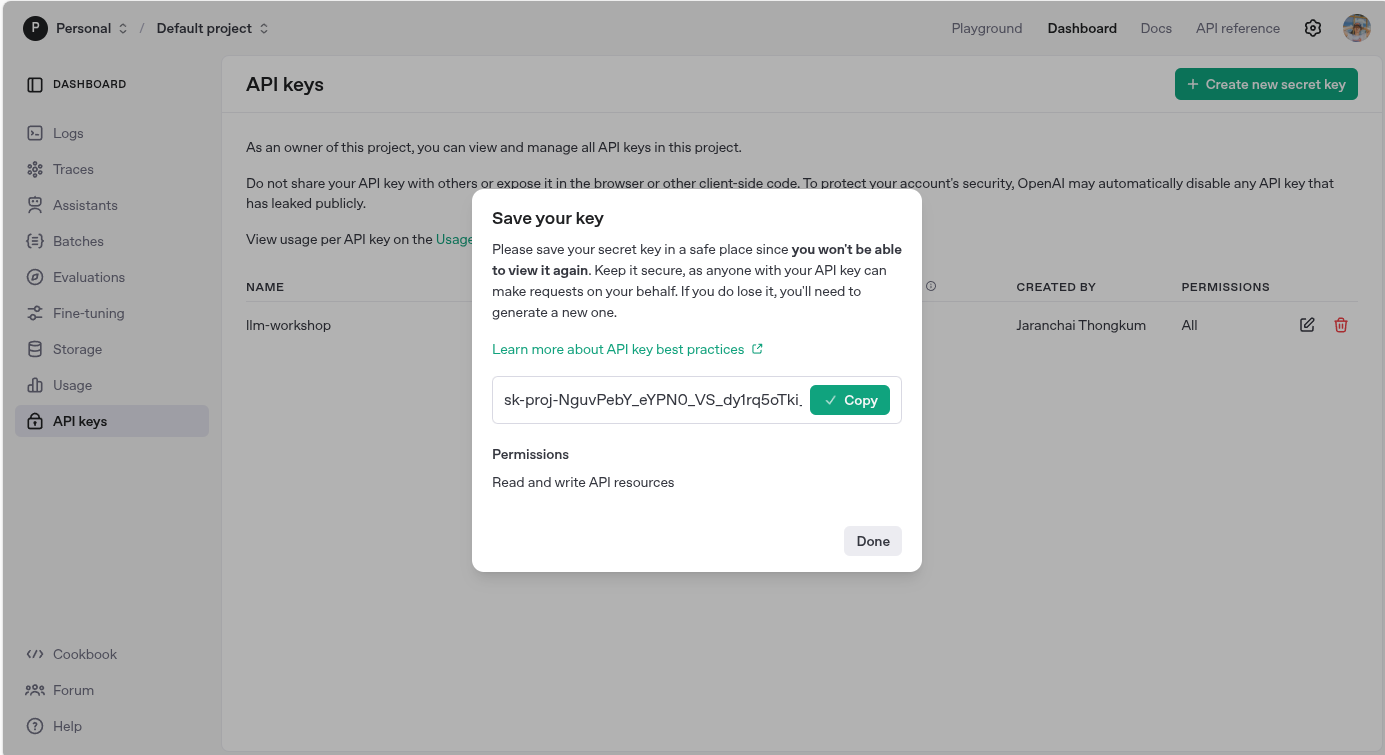
ซึ่งในกรณีที่เราทำ api key หาย ให้เราทำการลบทิ้ง แล้วสร้างใหม่เท่านั้น
สร้าง .env file
เมื่อเรามี api keys แล้วให้เราไปที่ project ของเรา llm-workshop เพื่อนำ secret key ตัว ไปเก็บไว้ในไฟล์ .env โดยที่ไฟล์นี้เราจะไม่ push ขึ้น git นะ
สร้างไฟล์ .env ขึ้นมาใน project ของเรา llm-workshop จากนั้น ก็เพิ่ม secret key ของ open ai ลงไป
OPENAI_API_KEY=[YOUR SECRET KEY]เริ่มต้นสร้าง Web Page Summarizer
เราจะมาสร้างโปรเจคแรกของเรากัน เริ่มต้นจากการปรับ environment ของเรากันก่อน ในบทความนี้เราจะใช้ anaconda ในการกำหนด environment
หากใครยังไม่รู้ ก็ให้แวะไปอ่าน หรือ ติดตั้งกันก่อนเลย
เข้าไปที่ Terminal หรือ PowerShell ของเรา (หลังจากนี้ของเรียกว่า Terminal อย่างเดียวนะ)
จากนั้นเข้าไปที่โปรเจคของเราก่อนเลย
cd ./llm-workshopจากนั้นให้เราเปลี่ยน environment ให้เป็น llms จากที่เราสร้างไว้เมื่อบทความก่อน
conda activate llmsเมื่อเปลี่ยนแล้ว (base) จะเป็น (llms) แทน ถือว่าเปลี่ยนเสร็จแล้ว
(base) charanchai@charanchai-nutz-PC:~/Workspaces/Training/llm_engineering$ conda activate llms
(llms) charanchai@charanchai-nutz-PC:~/Workspaces/Training/llm_engineering$
output
จากนั้นเปิด jupter lab ขึ้นมา
https://jupyter.org/
jupyter labเข้าไปที่ http://localhost:8888 ถ้าเข้าไปได้ ให้ดูที่ terminal นะว่ามันเปิดที่ port ไหน
เท่านี้เราก็พร้อมสำหรับ lab แรกของเรากันแล้ว
Lab 1: Web Summarize
สำหรับ Lab วันแรกของเรา เป้าหมายของเรา คือ การเขียนโค้ด web browser แบบใหม่ ที่แค่ใส่ URL ลงไป แล้วมันจะตอบกลับมา พร้อมบทสรุป!!
ในโน๊ตบุ๊ค ของ jupyter ได้มีการเขียนอธิบายไว้แล้ว เราสามารถอ่านและทำตามนั้นได้เลย
บทความนี้เราใช้ไฟล์ 01-your-first-llm-project.ipynb
https://github.com/Thammasok/llm-workshop/blob/main/01-your-first-llm-project.ipynb
เอาละเริ่มมมมมม.....
Import Library
เริ่มต้นด้วยการ import library ต่างๆ ที่ต้องใช้งานกันก่อน
# imports

import os
import requests
from dotenv import load_dotenv
from bs4 import BeautifulSoup
from IPython.display import Markdown, display
from openai import OpenAI
เชื่อมต่อกับ OpenAI
โดยเราจะ load ตัว secret key จากไฟล์ .env เพื่อเชื่อมต่อกับ OpenAI
# Load environment variables in a file called .env

load_dotenv(override=True)
api_key = os.getenv('OPENAI_API_KEY')

# Check the key

if not api_key:
    print("No API key was found - please head over to the troubleshooting notebook in this folder to identify & fix!")
elif not api_key.startswith("sk-proj-"):
    print("An API key was found, but it doesn't start sk-proj-; please check you're using the right key - see troubleshooting notebook")
elif api_key.strip() != api_key:
    print("An API key was found, but it looks like it might have space or tab characters at the start or end - please remove them - see troubleshooting notebook")
else:
    print("API key found and looks good so far!")
จาก code ที่เขียนมา เราจะทำการดึงค่า secret key จากไฟล์ .env มาก่อน แล้วตรวจสอบว่าดึง key มาได้ไหม ให้เราลองกด run (play) ดู
ถ้าได้มันจะแสดงผลว่า
API key found and looks good so far!จากนั้นก็ทำการ เรียกใช้งาน openApi
openai = OpenAI()ให้เราลอง run ถ้าผ่านมันจะเลื่อนลงไปใน step ถัดไป
Hello there! Welcome, and thanks for reaching out. It's great to meet you! How can I assist you today?message from OpenAI
ลองเรียก model กัน
ทีนี้เราลองมาเขียน code เพื่อเรียกใช้งาน model จริงๆ กัน โดยในบทความนี้จะใช้ o3-mini-2025-01-31 เพราะว่า ถ้าเราใช้ o4-mini-2025-04-16 มันจำเป็นต้อง verify ตัวตนก่อน ซึ่งถ้าเราติดเรื่องนี้ เราจะได้ output message แบบนี้ (อยู่ล่าสุดของการแสดงผลเลย)
เอาละ กลับมาที่ o3-mini-2025-01-31 ของเรา เราจะกำหนดข้อความที่ส่งไปเป็นแบบนี้
message = "Hello, GPT! This is my first ever message to you"

response = openai.chat.completions.create(model="o3-mini-2025-01-31", messages=[{"role":"user", "content":message}])

print(response.choices[0].message.content)
เมื่อลอง run ดู เราจะได้ output แบบนี้
Hello there! I'm so glad you reached out and it's great to have you here. Whether you have questions, need assistance, or just want to chat, I'm here for you. How can I help you today?เมื่อเชื่อมต่อได้แล้ว เรามาลองทำเว็บไซต์กัน
# A class to represent a Webpage

# Some websites need you to use proper headers when fetching them:
headers = {
 "User-Agent": "Mozilla/5.0 (Windows NT 10.0; Win64; x64) AppleWebKit/537.36 (KHTML, like Gecko) Chrome/117.0.0.0 Safari/537.36"
}

class Website:

    def __init__(self, url):
        """
        Create this Website object from the given url using the BeautifulSoup library
        """
        self.url = url
        response = requests.get(url, headers=headers)
        soup = BeautifulSoup(response.content, 'html.parser')
        self.title = soup.title.string if soup.title else "No title found"
        for irrelevant in soup.body(["script", "style", "img", "input"]):
            irrelevant.decompose()
        self.text = soup.body.get_text(separator="\n", strip=True)
ต่อมาลลองเรียกเว็บไซต์ที่ต้องการแล้วพิมพ์มันออกมา
# Let's try one out. Change the website and add print statements to follow along.

ed = Website("https://nutshell.work")
print(ed.title)
print(ed.text)
Types of prompts
เราอาจรู้เรื่องนี้อยู่แล้ว - แต่ถ้าไม่รู้ เราจะคุ้นเคยกับมันมากขึ้น โมเดล เช่น GPT-o3 ได้รับการฝึกให้รับคำสั่งในลักษณะเฉพาะ โมเดลเหล่านี้คาดหวังว่าจะได้รับ
- A system prompt: ที่บอกมันว่า ให้มันทำภารกิจอะไร และ ควรใช้โทนเสียงแบบไหน
- A user prompt: หัวข้อสนทนาที่จะให้มันตอบกลับ
เมื่อรู้แล้ว เรามาลองกำหนด system prompt กันเลย
# Define our system prompt - you can experiment with this later, changing the last sentence to 'Respond in markdown in Spanish."

system_prompt = "You are an assistant that analyzes the contents of a website \
and provides a short summary, ignoring text that might be navigation related. \
Respond in markdown."
เมื่อเรากำหนด system prompt แล้ว งั้นเรามาลองสร้าง function สำหรับตอบคำถามกับ user กัน
# A function that writes a User Prompt that asks for summaries of websites:

def user_prompt_for(website):
    user_prompt = f"You are looking at a website titled {website.title}"
    user_prompt += "\nThe contents of this website is as follows; \
please provide a short summary of this website in markdown. \
If it includes news or announcements, then summarize these too.\n\n"
    user_prompt += website.text
    return user_prompt

print(user_prompt_for(ed))
เมื่อเราลอง run ดูจะได้ข้อมูลสรุปมา โดยจะมีหัวข้อตามที่เรากำหนดไว้ แล้วตามด้วยคำตอบที่
You are looking at a website titled พื้นที่สำหรับจดบันทึกความรู้และแชร์ประสบการณ์
The contents of this website is as follows; please provide a short summary of this website in markdown. If it includes news or announcements, then summarize these too.
...
Messages
API จาก OpenAI คาดหวังว่าจะได้รับข้อความในโครงสร้างที่เฉพาะ และ API ตัวอื่นๆ ก็ใช้โครงสร้างนี้เช่นกัน
```python
[
    {"role": "system", "content": "system message goes here"},
    {"role": "user", "content": "user message goes here"}
]
```
เพื่อให้ได้เห็นภาพ หน้าตามันก็จะประมาณนี้
messages = [
    {"role": "system", "content": "คุณคือตลก ให้ตอบแบบตลกๆ"},
    {"role": "user", "content": "2 + 2 เท่ากับเท่าไหร่"}
]
เมื่อกำหนดเสร็จแล้ว ให้เราเรียกใช้ openai
response = openai.chat.completions.create(model="gpt-4o-mini", messages=messages)
print(response.choices[0].message.content)
เมื่อลอง run ก็จะได้คำตอบประมาณนี้
2 + 2 เท่ากับ 4 ครับ แต่ว่าถ้า 2 + 2 ไปเที่ยวด้วยกันแล้วเกิดหลงทาง พวกเขาอาจจะกลับมาเป็น 22 ก็ได้นะ! 😄มุขลึกไปหน่อย ไม่ค่อยเข้าใจเท่าไหร่ แต่ก็ถือว่าผ่าน
ตอนนี้เราจะสร้างข้อความสำหรับ GPT-o3-mini โดยผ่านฟังก์ชันกัน
def messages_for(website):
    return [
        {"role": "system", "content": system_prompt},
        {"role": "user", "content": user_prompt_for(website)}
    ]

messages_for(ed)
การใช้งาน API สำหรับ OpenAI นั้นง่ายมาก ถึงเวลารวมทุกอย่างเข้าด้วยกัน
# And now: call the OpenAI API. You will get very familiar with this!

def summarize(url):
    website = Website(url)
    response = openai.chat.completions.create(
        model = "o3-mini-2025-01-31",
        messages = messages_for(website)
    )
    return response.choices[0].message.content

summarize("https://nutshell.work")
Output
'```markdown\n# Summary of the Website\n\n**Title:** "พื้นที่สำหรับจดบันทึกความรู้และแชร์ประสบการณ์"\n\n**Overview:** \nThis website is a tech-focused personal blog where the author shares knowledge and experiences gained through hands-on learning and practice. The content is primarily oriented towards topics in software development, system reliability engineering (SRE), databases, and AI technologies.\n\n**Key Content Areas:**\n- **DevOps & SRE:** \n - Discussion on why MCP (Model Context Protocol) is critical for AI-driven SRE.\n- **Databases:** \n - Articles on optimizing MongoDB index creation using ESR guidelines.\n - Tips on enhancing Mongoose queries with lean() for improved performance.\n- **LLM Engineering:** \n - Series on setting up essential tools and getting started with modern machine learning models.\n - Guides on installing and configuring tools like Ollama.\n- **Programming & Tools:** \n - The site hosts a range of series and posts covering basic to advanced programming, frontend/backend development, and various technical tools.\n\n**Additional Information:** \n- The website organizes content using tags like Business, The Series, Basic, Programming, DevOps, etc.\n- It includes a subscription and sign-in feature for users to follow updates.\n- The design appears minimalistic with a focus on delivering concise, practical insights and tutorials.\n\n**Announcements/News:** \n- Recent posts indicate active updates, with articles published just hours or minutes ago, highlighting current trends and technical insights.\n\nOverall, the site serves as a hub for professionals interested in practical tech knowledge, offering brief, informative reads on modern technical challenges and solutions.\n```'แถม หากว่าเราอยากแสดงผลออกมาเป็นรูปแบบของ Markdown ก็จะเขียนแบบนี้
def display_summary(url):
    summary = summarize(url)
    display(Markdown(summary))

display_summary("https://nutshell.work")
Output
**Summary of the Website**

This website is a personal knowledge base and experience-sharing platform focused on technical topics and practical insights. It features a collection of articles written primarily by Charanchai Thongkham on subjects including:

- AI-driven Site Reliability Engineering (SRE) with a focus on concepts like MCP (Model Context Protocol) and AI agents.
- MongoDB performance tips, such as effective index creation and optimizing Mongoose queries.
- A series of posts on LLM (Large Language Model) Engineering that cover tool setup and practical guides (e.g., using Ollama, Python environments).

Additional site features include:
- Organized tags (Business, The Series, Programming, etc.) to help readers navigate different topics.
- A subscription and sign-in system for regular visitors.

The website aims to deliver actionable insights and share hands-on experiences from the author's learnings and projects.
จบการเริ่มต้น สร้าง llm ตัวแรกกันแล้ว
Note
วิธีนี้จะใช้ได้เฉพาะกับเว็บไซต์ที่สามารถถูกเก็บข้อมูลได้ด้วยวิธีการง่ายๆ นี้เท่านั้น เว็บไซต์ที่สร้างด้วย Javascript เช่น แอป React จะไม่แสดงผล หากต้องการจะหลีกเลี่ยงปัญหานี้ เราจะต้องใช้เครื่องมืออื่นๆ อย่าง Selenium รวมถึงเว็บไซต์ที่ป้องกันด้วย CloudFront (และที่คล้ายๆ กัน) อาจแสดงข้อผิดพลาด 403 ออกมาได้